Entry 006
Building a Mini Digital Archive Server in Docker: A Beginner Linux Admin Tutorial
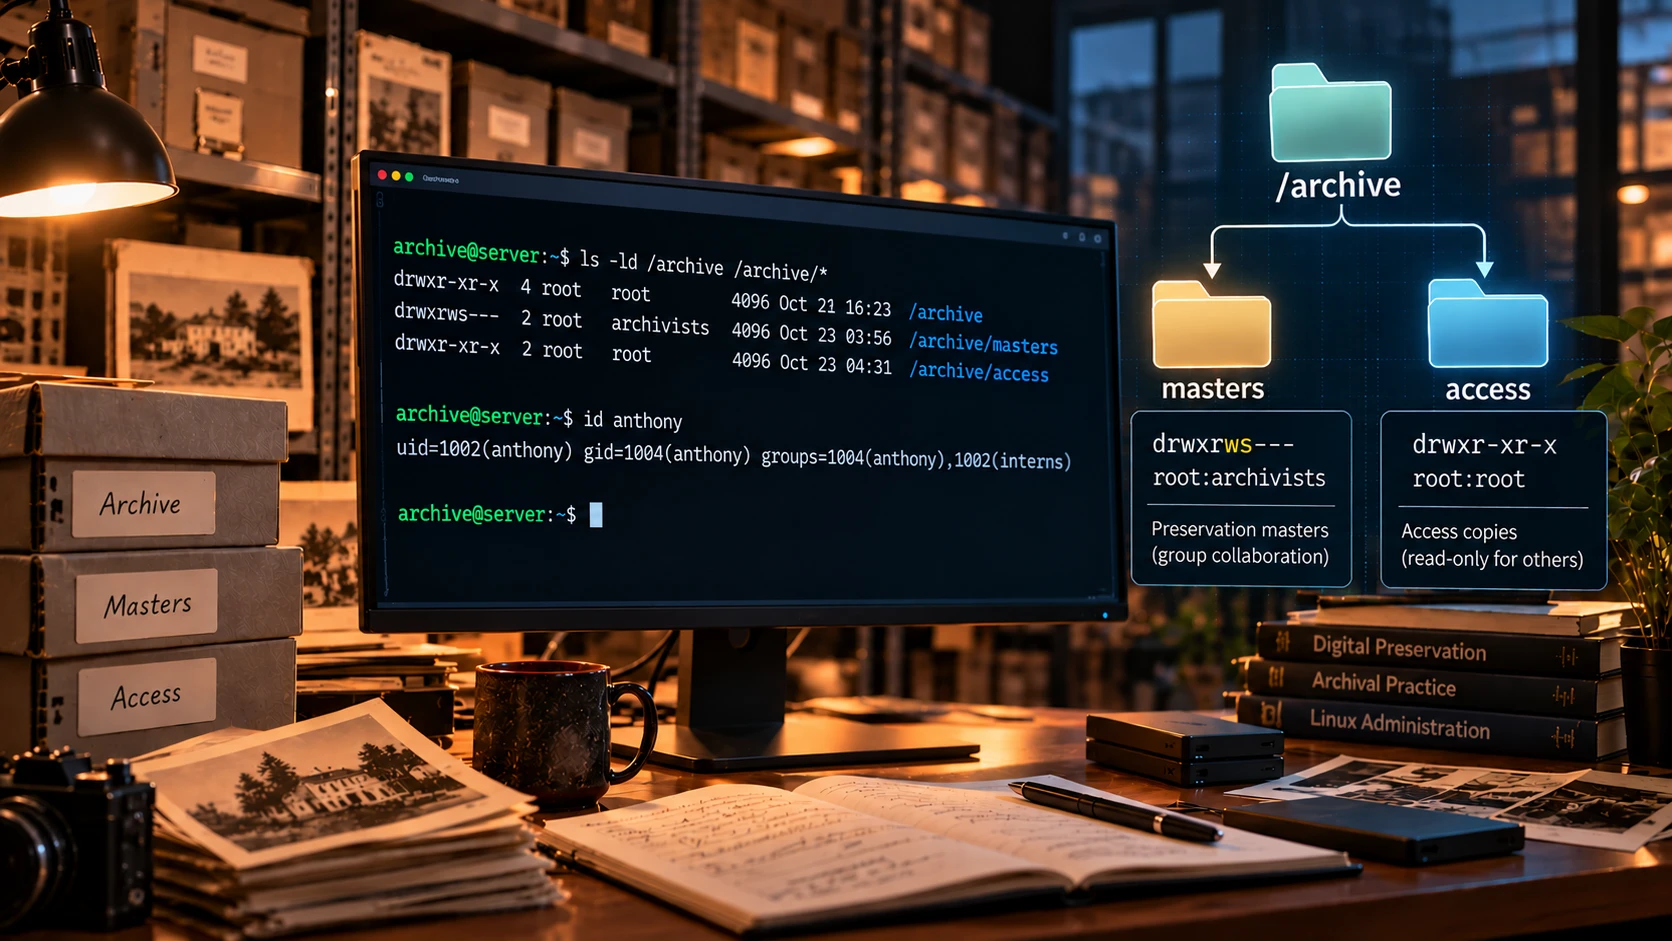
This tutorial walks through the basics of Linux system administration inside a Docker container. Instead of running commands one at a time with no context, you’ll build something with a purpose: a small digital archive server, set up the way a real archive or special collections department might run a shared machine.
- Archivists can create and edit the master files.
- Interns can log in but can’t touch the masters.
- The public gets a read-only web page served by nginx.
The examples were run in an Ubuntu 24.04 container using Docker Desktop on a Mac, but they work with Docker on any OS.
AI-assistance disclosure: this post was drafted by Claude Opus 5.5, an AI model made by Anthropic, based on a lab session from Luis’s CIS 3850 Systems & Network Admin class. Some explanations were adapted from an earlier draft made with GPT-6. Luis ran and tested every command in his own container, including the bugs. If something doesn’t work for you, message Luis on Instagram at @pro.sumer.
What you will learn
- How to start an interactive Ubuntu container with a port mapped to your computer
- How to create users and groups, and how to read
/etc/passwdand/etc/group - Why supplementary groups are the right tool for job roles
- How Linux permissions work on files and on folders, including the setgid bit and
umask - How to install software with
apt - How to start, inspect and stop processes with
ps,pgrep,topandkill - How to debug two real problems: a redirect that drops your port, and a 403 Forbidden
Part 1: Spin up the box
Open a terminal on your computer and run:
docker run -it --name archive-box -p 8080:80 ubuntu:24.04 bash-it: interactive mode with a terminal, so you get a shell prompt inside the container--name archive-box: a readable name, so you don’t have to type the container ID-p 8080:80: maps port 8080 on your computer to port 80 inside the container. This is how your browser will reach the web server later. You can’t add a port mapping after the container starts, so don’t skip it.ubuntu:24.04: the image to runbash: the program to start inside it
Your prompt changes to something like root@c2c174374dee:/#. You’re now root inside the container, and the string of letters and numbers is the container ID. Because you’re already root, none of the commands below need sudo. On a normal Linux machine, you’d put sudo in front of the admin commands.
Take a look around:
whoami              # root
hostname            # the container ID
cat /etc/os-release # Ubuntu 24.04
uname -r            # kernel version
df -h               # disk usage
A detail worth noticing: uname -r doesn’t report an Ubuntu kernel. It reports the kernel of the machine Docker is running on (on a Mac, the Linux VM Docker Desktop runs in the background). Containers share the host’s kernel. They get their own user space (files, users, processes), but the kernel space (CPU, memory, devices) belongs to the host. That’s the main difference between a container and a full virtual machine.
Part 2: Users and groups
First, create two groups for the two job roles:
groupadd archivists
groupadd interns
Then create three people: two archivists and one intern. You need two archivists so you can test whether they can edit each other’s files later.
useradd -m -s /bin/bash -G archivists isabella
useradd -m -s /bin/bash -G archivists maria
useradd -m -s /bin/bash -G interns anthony-m: create a home directory (/home/isabella)-s /bin/bash: give the user Bash as their login shell-G archivists: add the user toarchivistsas a supplementary group
Passwords are optional here. Root can switch to any account with su without a password, so you can skip passwd in this lab. On a real server, you’d set one with passwd isabella.
Check your work:
id isabella
uid=1001(isabella) gid=1003(isabella) groups=1003(isabella),1001(archivists)
Your numbers may be different. What matters is the shape:
uid: Isabella’s user ID. Linux tracks users by number, not by name.gid: her primary group, a private group also calledisabella. Ubuntu creates it automatically.groups: every group she belongs to, includingarchivists.
The user isabella and the group isabella are two separate things that happen to share a name.
Reading /etc/passwd and /etc/group
Linux stores local accounts in plain text files. Look at the newest entries:
tail -n 3 /etc/passwd /etc/groupGotcha: Use tail -n 3, not tail -3. The short form is an old syntax that GNU tail only accepts with a single file. With two files, it fails with invalid option -- '3'.
A line from /etc/passwd looks like this:
isabella:x:1001:1003::/home/isabella:/bin/bashEach colon separates a field:
| Field | Example | Meaning |
|---|---|---|
| Username | isabella |
Account name |
| Password | x |
The real password hash is in /etc/shadow, which only root can read |
| UID | 1001 |
User ID |
| GID | 1003 |
Primary group ID |
| Comment | (empty) | Optional full name or notes |
| Home | /home/isabella |
Home directory |
| Shell | /bin/bash |
Login shell |
And from /etc/group:
archivists:x:1001:isabella,maria
interns:x:1002:anthony
isabella:x:1003:
The last field lists the group’s members. The isabella group shows an empty member list, but she’s still in it. Primary group membership is recorded in the GID field of /etc/passwd, not here. Only supplementary members are listed in /etc/group.
Quick tip: To find one account instead of scrolling, use grep:
grep '^isabella:' /etc/passwdThe ^ means “starts with”, so this matches only the line for the isabella account and not some other line that happens to contain the name.
Why a supplementary group instead of a primary group?
Using -G (capital) keeps Isabella’s private primary group and adds archivists as an extra membership. Using -g (lowercase) would make archivists her primary group instead. There are four reasons to prefer -G:
- Personal files stay personal. Every file a user creates gets their primary group by default. If
archivistswere Isabella’s primary group, every file in her home folder would belong to the whole team. - Roles aren’t identity. Being an archivist is a job. You can add or remove the role without changing any existing files:
usermod -aG archivists anthony # promote Anthony (-a means append) gpasswd -d anthony archivists # take it back - People can hold several roles. A user has one primary group but can have many supplementary groups.
- The shared folder takes care of itself. In the next part, the setgid bit makes new files in the masters folder belong to
archivistsautomatically.
Gotcha: usermod -G without -a replaces all of the user’s supplementary groups. Always use -aG.
Part 3: Permissions
Quick reference: permission numbers
| Number | Permission | Symbol |
|---|---|---|
| 4 | read | r |
| 2 | write | w |
| 1 | execute | x |
Add the numbers together for each of the three groups of people: owner, group and others. For example, 755 means the owner gets 7 (4+2+1 = rwx), and the group and everyone else get 5 (4+1 = r-x).
Folders aren’t files
The same three letters mean different things on a folder, and this trips up almost everyone:
| Permission | On a file | On a folder |
|---|---|---|
r |
Read the contents | List what’s inside (ls) |
w |
Change the contents | Create, delete or rename things inside (needs x too) |
x |
Run it as a program | Enter it and reach anything inside |
x on a folder has nothing to do with running programs. It’s the key to the door. Without it, you can’t get to anything inside, even a file that’s open to everyone. Keep this in mind for the 403 error later.
Create the folders
mkdir -p /archive/{masters,access}-p: creates/archivefirst if it doesn’t exist{masters,access}: brace expansion. The shell turns it into/archive/masters /archive/accessbeforemkdirruns.
The masters folder: team only
chown -R root:archivists /archive/masters
chmod 2770 /archive/masters
chown root:archivists: root is the user owner, andarchivistsis the group owner2770breaks down like this:2: the setgid bit. New files created inside inherit the folder’s group (archivists).7: owner (root) getsrwx7: group (archivists) getsrwx0: everyone else gets nothing, not even a look inside
Check it:
ls -ld /archive/masters
# drwxrws--- 2 root archivists 4096 Oct 22 20:30 /archive/masters(-d shows the folder itself instead of what’s inside it.) See the lowercase s where the group’s x would normally be? That’s setgid, switched on.
Does root need to be in archivists for this to work? No. The folder just records two labels, a user owner and a group owner, and they don’t have to be related. When Isabella tries to get in, Linux checks:
- Is she the owner (root)? No.
- Is she in the owning group (
archivists)? Yes, so the group’srwxapplies.
Group membership decides which set of permissions applies to you. The bits decide what you’re allowed to do.
Test it by running a command as each user:
su - anthony -c "touch /archive/masters/test.txt"
# touch: cannot touch '/archive/masters/test.txt': Permission denied

su - isabella -c "touch /archive/masters/interview.txt"
# no output means it worked

ls -l /archive/masters
# -rw-r--r-- 1 isabella archivists 0 Oct 22 interview.txt
The file’s user owner is isabella, but its group owner is archivists, not isabella. That’s setgid at work. Without the 2, the file would belong to Isabella’s private group.
su - username starts a fresh login as that user, so group changes take effect right away. A shell that was already open wouldn’t see new group memberships until the user logged in again.
The umask problem: setgid isn’t enough
Look at that file again: -rw-r--r--. The group is archivists, but the group only has read. Try having Maria edit Isabella’s file:
su - maria -c "echo 'transcript notes' >> /archive/masters/interview.txt"
# Permission denied
Setgid gave the file the right group, but it didn’t give that group write access. That’s controlled by the umask, a mask that removes permissions from every new file a user creates:
su - isabella -c umask
# 0022
New files start as 666 (rw-rw-rw-), and the umask takes bits away:
| umask | New file | New folder | Who can write |
|---|---|---|---|
022 |
644 (rw-r--r--) |
755 |
Only the owner (the default) |
002 |
664 (rw-rw-r--) |
775 |
Owner and group |
077 |
600 (rw-------) |
700 |
Only the owner, and no one else can even read |
For a team folder, archivists need 002. Set it in each archivist’s login profile so it sticks:
echo "umask 002" >> /home/isabella/.profile
echo "umask 002" >> /home/maria/.profile
Fix the file that already exists (umask only affects new files), then test again:
chmod g+w /archive/masters/interview.txt

su - isabella -c "touch /archive/masters/interview2.txt"
ls -l /archive/masters/interview2.txt
# -rw-rw-r-- 1 isabella archivists 0 Oct 22 interview2.txt

su - maria -c "echo 'transcript notes' >> /archive/masters/interview2.txt"
# works
chmod g+w is symbolic notation: group, add (+) write. It’s handy when you want to change one bit without retyping the whole number.
So the full recipe for a shared folder is:
chown: who owns itchmod 2770: who can get in, and new files inherit the groupumask 002: new files are writable by that group
Why was the umask 022 and not 002? Ubuntu can automatically give 002 to users whose private group matches their user ID. Run grep -E '^(USERGROUPS_ENAB|UMASK)' /etc/login.defs to see the settings. Here, the groups were created first, so Isabella’s UID and GID don’t match, and she gets the plain 022. Your results may be different, so always check with umask.
Notice that 664 still gives others read access to the file itself. Nobody outside the group can get to it, though, because the 0 on the masters folder locks the door.
The access folder: only root publishes
chmod 755 /archive/access
ls -ld /archive/access
# drwxr-xr-x 2 root root ... /archive/access
This folder is the public copy that the web server reads from. It’s owned by root:root with 755, so only root can write to it. Archivists, interns and the web server can read it but can’t change it.
This is deliberate. It’s the principle of least privilege: every account gets only the access its job needs. The web server only needs to read, so if someone ever finds a hole in the site, they can’t use the web server to drop files into the folder. Publishing becomes a deliberate step that only an admin can take, much like a reading room that gets copies while the originals stay locked away.
Part 4: Software
The Ubuntu Docker image is stripped down. It doesn’t even include ps. Install what the archive needs:
apt update && apt install -y nginx libimage-exiftool-perl procps curlapt update: refreshes the list of available packages. Always run it first in a new container.nginx: the web serverlibimage-exiftool-perl: providesexiftool, a metadata reader used in real digital preservation workprocps: providesps,topandpgrepcurl: makes web requests from the command line, which you’ll need for debugging later
Confirm everything installed:
dpkg -l | grep -E "nginx|exiftool|procps"
exiftool -ver
Try exiftool on a file in the masters folder:
exiftool /archive/masters/interview2.txtThe output includes the file’s type, size, modification date and permissions. That’s the same information you’ve been setting by hand, read back as metadata.
Part 5: Processes
Publish a page and start the server
As root, create a home page in the access folder and link it into nginx’s web root:
echo "<h1>Collection Home</h1>" > /archive/access/index.html
ln -sf /archive/access /var/www/html/archive
nginx
ln -sf: creates a symbolic link, a shortcut. nginx serves files from/var/www/html, so/var/www/html/archivenow points to your access folder.nginx: starts the server in the background
Inspect the processes
ps aux | grep nginx
pgrep nginx
top                 # press q to quit
You’ll see something like this:
root      2961  ... nginx: master process nginx
www-data  2962  ... nginx: worker process
www-data  2963  ... nginx: worker process
...
A few things to notice:
- One master and many workers. The master runs as root because it needs root to bind to port 80. The workers, which handle the actual web requests, run as
www-data, a low-privilege account. Least privilege again. - The number of workers matches your CPU cores. nginx’s default setting is
worker_processes auto. Runnprocto see how many cores Docker gives the container. - The master is the parent. You can see the tree with:
ps -ef --forest | grep nginx
Visit the site
In your browser, go to:
http://localhost:8080/archive/You should see Collection Home.
Debugging 1: The page won’t load without a trailing slash
When Luis first visited localhost:8080/archive (no slash at the end), nothing loaded. nginx was running fine, so the problem was somewhere else. curl shows what’s going on:
curl -I localhost/archive
HTTP/1.1 301 Moved Permanently
Location: http://localhost/archive/
/archive is a folder, so nginx redirects to /archive/. But nginx thinks it’s on port 80, because that’s true inside the container, so it builds the redirect without your port. The browser follows it to localhost:80 on your computer, where nothing is listening.
Quick fix: always type the trailing slash.
Real fix: tell nginx to send relative redirects, which leave out the host and port:
sed -i 's/server_name _;/server_name _;\n\tabsolute_redirect off;/' /etc/nginx/sites-available/default
nginx -t && nginx -s reload
curl -I localhost/archive
# Location: /archive/
sed -i: edits the file in place, addingabsolute_redirect off;under theserver_namelinenginx -t: tests the configuration before applying it, so a typo doesn’t take the server downnginx -s reload: applies the new configuration without stopping the server
Now localhost:8080/archive works with or without the slash.
Debugging 2: Break it on purpose with permissions
This is where permissions and processes meet. Remove the “others” permissions from the access folder:
chmod 700 /archive/accessRefresh the browser and you get:
403 Forbidden
nginx/1.24.0 (Ubuntu)
Why? The worker processes run as www-data. That account isn’t the owner (root) and isn’t in the group (root), so it falls under others, and 700 gives others nothing. Without x on the folder, www-data can’t even get in, so it never reaches index.html, even though the file itself is readable.
If you didn’t break it on purpose, the nginx error log tells you exactly where it was blocked:
tail -n 5 /var/log/nginx/error.log
# ... "/var/www/html/archive/index.html" is forbidden (13: Permission denied)
Fix it:
chmod 755 /archive/accessRefresh, and Collection Home is back.
Bonus hardening: stop advertising your version
That 403 page told the world the exact server version, nginx/1.24.0 (Ubuntu). An attacker can use that to look up known vulnerabilities. Hide it:
sed -i 's/# server_tokens off;/server_tokens off;/' /etc/nginx/nginx.conf
nginx -t && nginx -s reload
Now error pages just say nginx.
Part 6: Stopping processes
Kill a worker and watch it come back
Pick any worker PID from pgrep nginx (use your own numbers, since PIDs change every time nginx starts):
kill 2962
pgrep nginx
PID 2962 is gone, but a new PID has taken its place. The master noticed a dead child and started a replacement. That’s why killing a worker doesn’t stop a web server.
Kill the master
To actually stop nginx, kill the master process. That’s the one owned by root, and it has the lowest nginx PID:
kill 2961
pgrep nginx         # no output; everything is gone
Refresh the browser and you get a connection error. Compare that with the 403 from earlier:
| What you see | What it means |
|---|---|
| 403 Forbidden | A server is running but refused the request |
| Connection error | Nothing is listening at all |
Telling those two apart is half of troubleshooting a web server.
Save your work
Everything you built lives only in this container. Nothing is saved to your computer unless you set up a volume. To keep a snapshot, run this from your computer’s terminal, not inside the container:
docker commit archive-box archive-box:v1To come back to the same container later:
docker start -ai archive-box
nginx               # nginx doesn't restart on its own
exit inside the container stops it, because bash was the container’s main process.
Quick reference
| Task | Command |
|---|---|
| Create a group | groupadd archivists |
| Create a user with a supplementary group | useradd -m -s /bin/bash -G archivists isabella |
| Add a user to another group | usermod -aG interns isabella |
| Show a user’s IDs and groups | id isabella |
| Find one account | grep '^isabella:' /etc/passwd |
| Change owner and group | chown root:archivists /archive/masters |
| Team-only folder with setgid | chmod 2770 /archive/masters |
| Public read-only folder | chmod 755 /archive/access |
| Add group write to one file | chmod g+w file.txt |
| Show a folder’s own permissions | ls -ld /archive/masters |
| Check the umask | umask |
| Run a command as another user | su - anthony -c "command" |
| Install software | apt update && apt install -y nginx |
| Find processes | ps aux | grep nginx or pgrep nginx |
| Show the process tree | ps -ef --forest |
| Live process view | top (press q to quit) |
| Test and reload nginx | nginx -t && nginx -s reload |
| Check HTTP headers | curl -I localhost/archive |
| Stop a process | kill <PID> |
What’s next
This container is the first piece of a bigger lab. The next step is capturing the traffic between the browser and this server with Wireshark, to watch the port mapping, the 301 redirect and the HTTP requests from the network’s point of view.